Good weather and motorcycle parts, almost a perfect combination. It would be perfect if all those motorcycle parts fit together to make a complete bike you can ride around in this summer preview. One day soon!
I was able to get more time on the project and finished up the machining of the upper control arm. I was able to make a second use of the baseplate for the crankcase girdle as one of the needed holes intersected with any of the existing holes. After a little bandsaw prep to cut off large excess stock areas I was ready for more machining.
Those chunks went into the recycling bucket that gets emptied every few weeks and results in a nice Lisa’s Deli sandwich for everyone lucky enough to be in the shop that day. They make great fresh mozzarella.
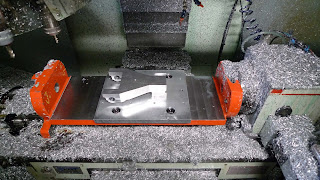
Now back to the mill with the part bolted onto the trunnion with a baseplate and a few precision spacers to lift the part a bit off the table surface.
The first operation results in a recognizable part and a lot of chips.
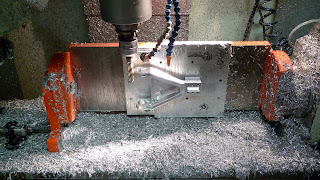
Then I turn the table and rough out the bearing bores and give the arm its tapering profile.
Now fine boring the bearing pocket to a M6 tolerance grade. That’s Peter’s boring head and bar. Its a very nice setup he got from Mari Tool.
Then I spin the baseplate and drill and counterbore the trail adjustment screw hole.
This operation is semi-manual, the tool is a 2 piece assembly: a keyed shaft and removable counterbore cutting head. It is used a lot in the aircraft industry where it is not possible to get a spindle on the correct side of a hole to make a counterbore. So at the price of a little manual intervention you can get a clean spotface for a screw head where you otherwise would not be able to. It is a good technique which I’ve used on both V4 crankcase castings, some main case bolts on the recent billet TZ250 crankcase project, and now on this suspension link. There are automated tools that accomplish the same thing at a greatly increased price. When my production volumes make the manual technique unwieldy than an automatic tool will be purchased.
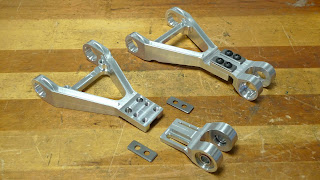
There are 4 screws that hold this adjustable arm design together. To maximize clamping force over the largest possible area instead of using washers I machined some 6Al-4V Titanium cap plates. These cute little parts prevent marring and ensure a tightly clamped joint. Since the trunnion was still on Peter’s mill I used my Bridgeport CNC knee mill to make these. While this machine is in no way capable of making 90% of the parts in this project it is perfectly suitable for a lot of the smaller less dimensionally critical parts. There was even a piece of aluminum already clamped in the vice that I could use as a baseplate.
I had a sheet of Ti from another project that was the perfect size. I machined 2 holes on the manual mill, bolted the part down, than ran the program that automatically separates the part from the extra stock upon completion.
Drill new holes, repeat a few times and there are enough parts for 2 complete arms.
One more assembly to cross off the To-Do list. Yea!
Chris


When i come down to fabricate swingarms lets get that Mozzarella at Lisa's Deli! Can't wait.
Oh yeah…..nice parts.
Baron Von Pickmeister
BVP, That's a great suggestion. The next parts I'll do will be the remaining swingarm billet pieces: the pivot plate and upper shock mount.