

In an attempt to get a handle on the many headed monster that is fabricating a custom motorcycle, I’m going to spend a bit of time this week to get some motion on the chassis end of the project going. When the engine is done it would be nice to have a chassis close to ready to bolt it in, or at least in condition to strap on to a dyno and start tuning. If you have been following for a while, you’ll recognize the front end parts in this design, though with a little dust on them.
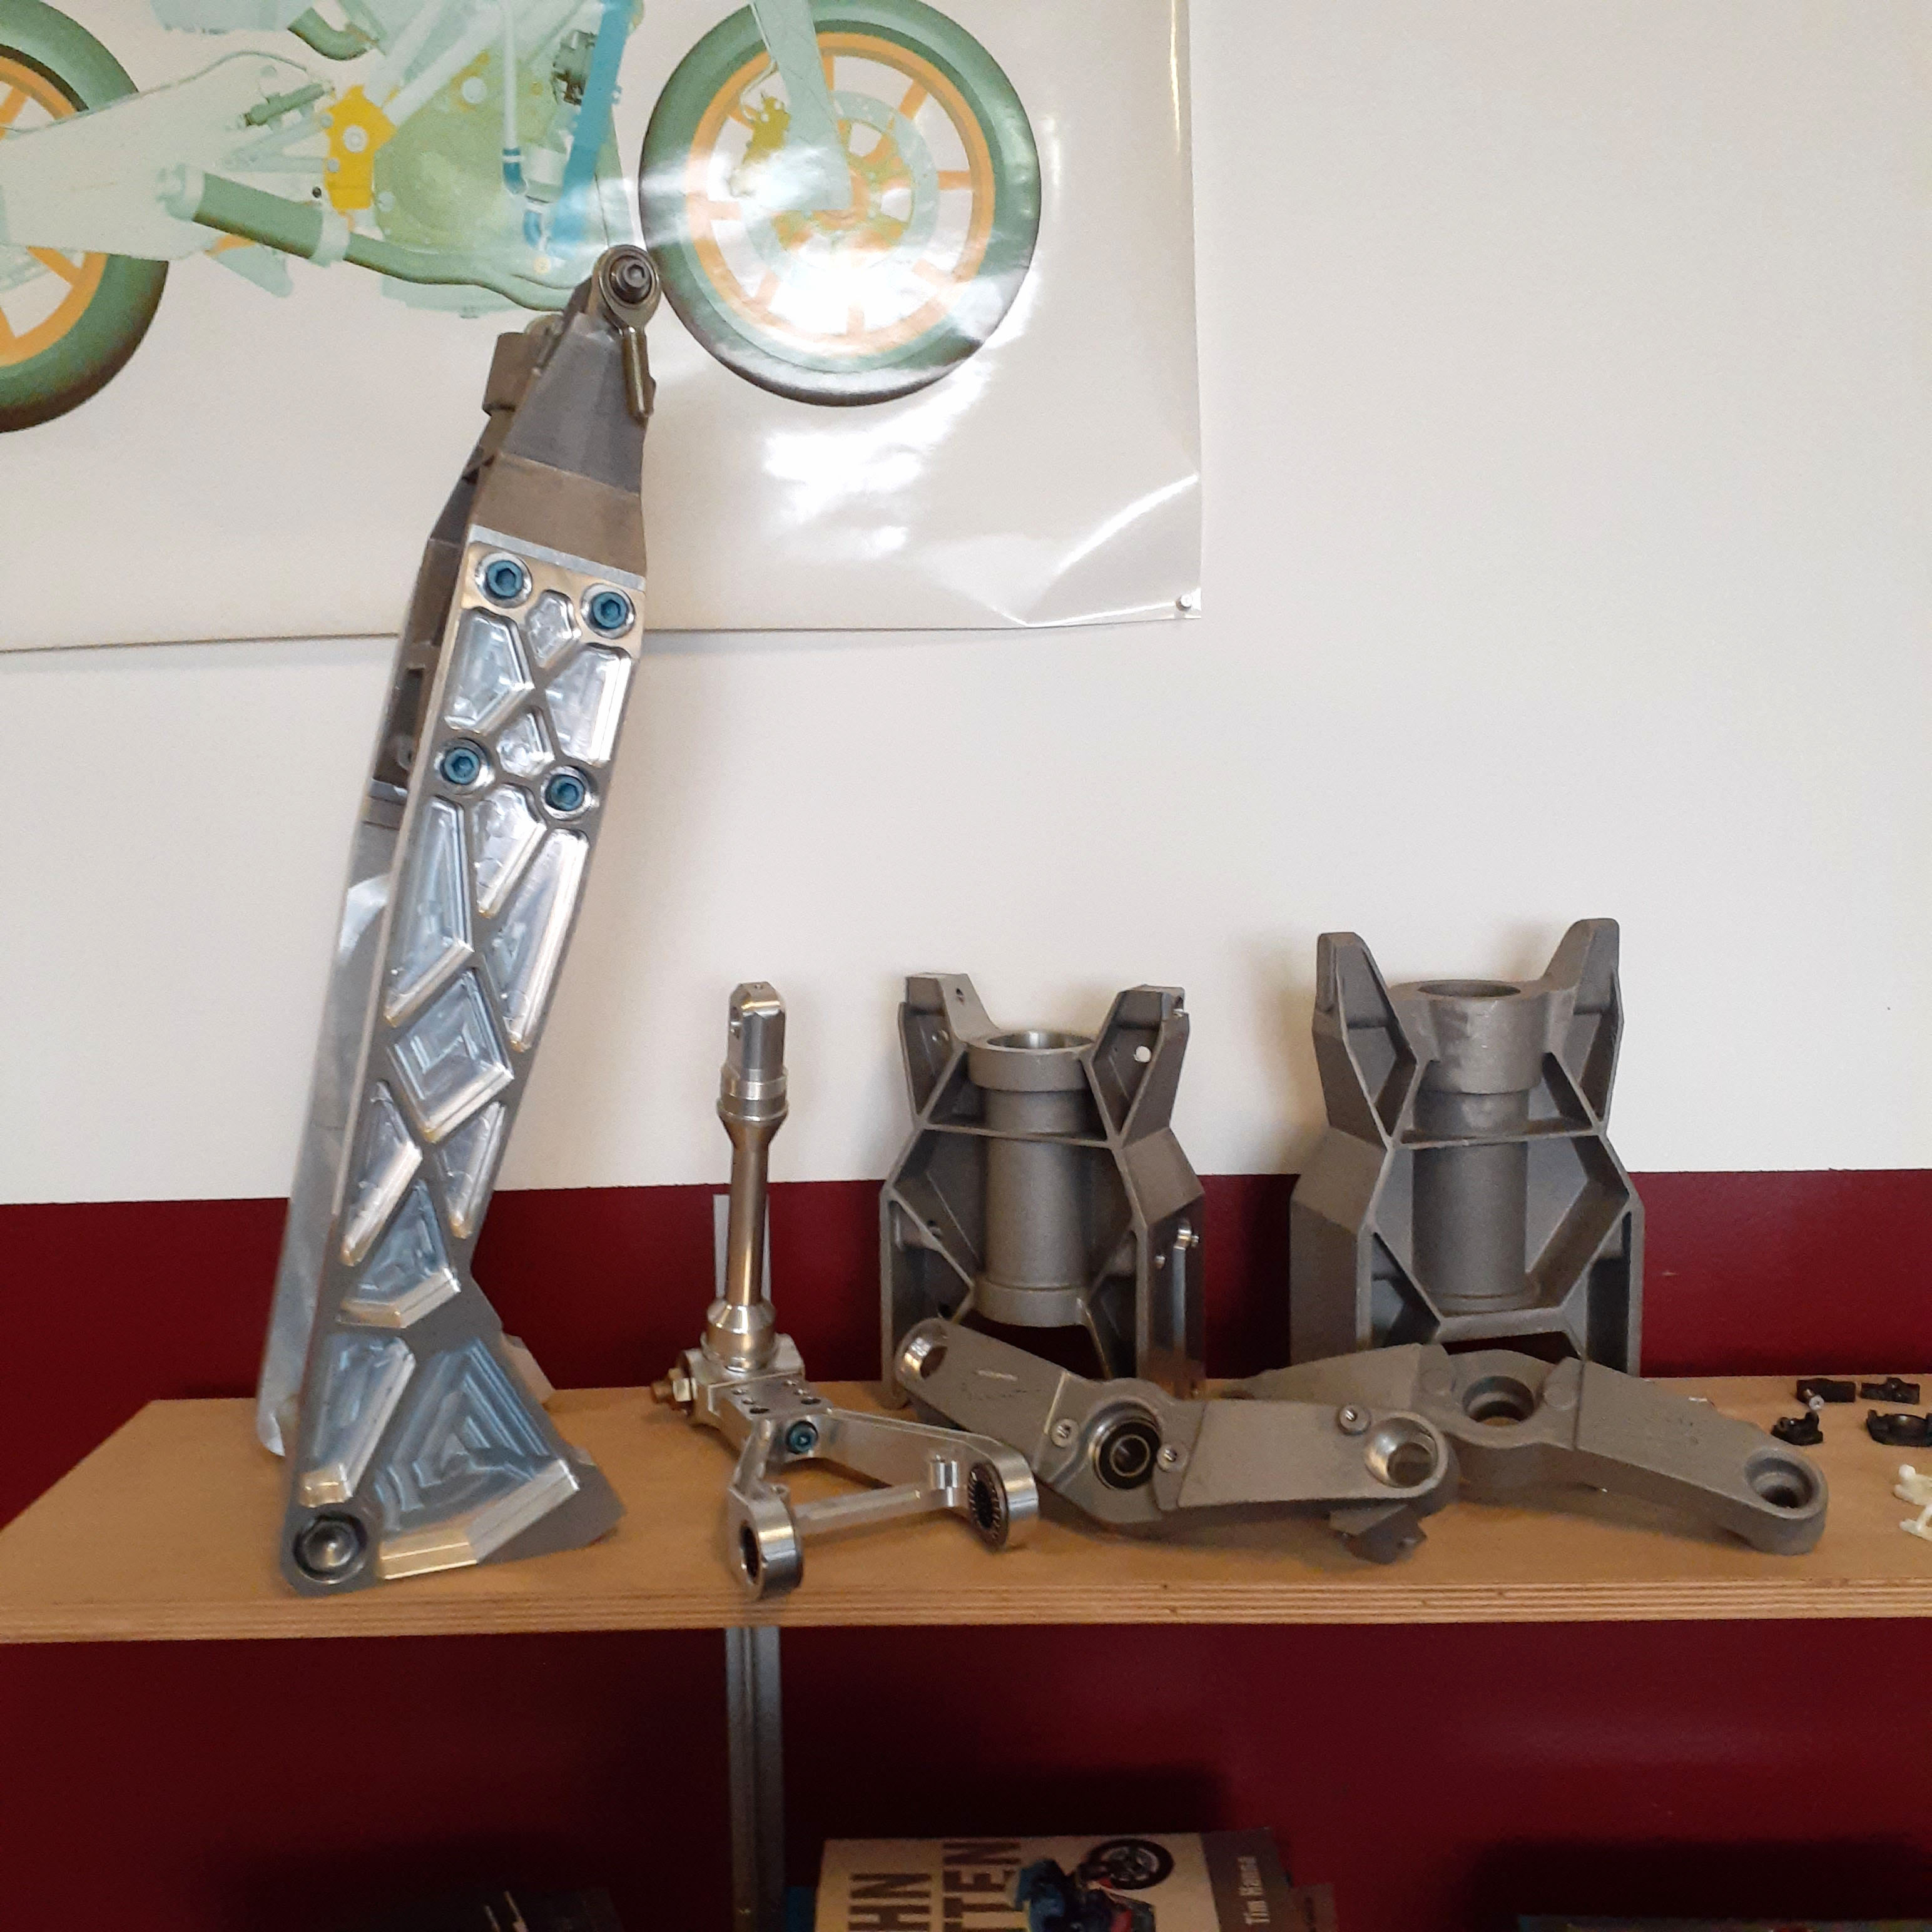
They are part of the original Rotacular successor/Moto2 V4 project/now Hypermono rolling chassis design. I am somewhat fortunate that the motorcycle industry incorporates change at a glacial pace, so all the chassis innovations I am developing are as relevant today as they were 10+ years ago, and in some cases even more so.
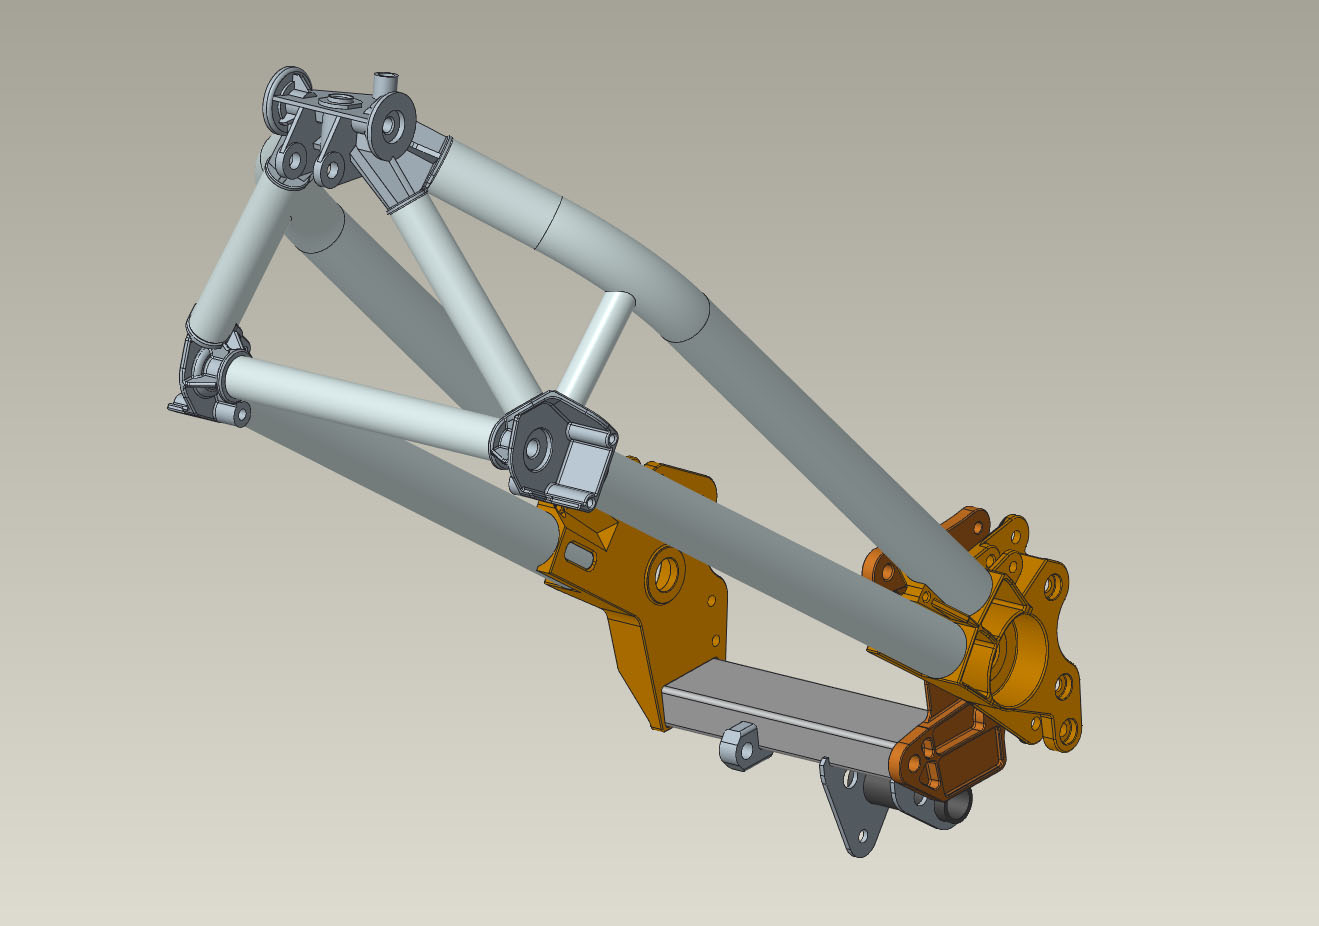
With most of the front end already fabricated, I wanted to get some of the main chassis in progress. The chassis is some simple tubular sections with 4130 steel lugs for the swingarm pivot and front suspension arm mounts.
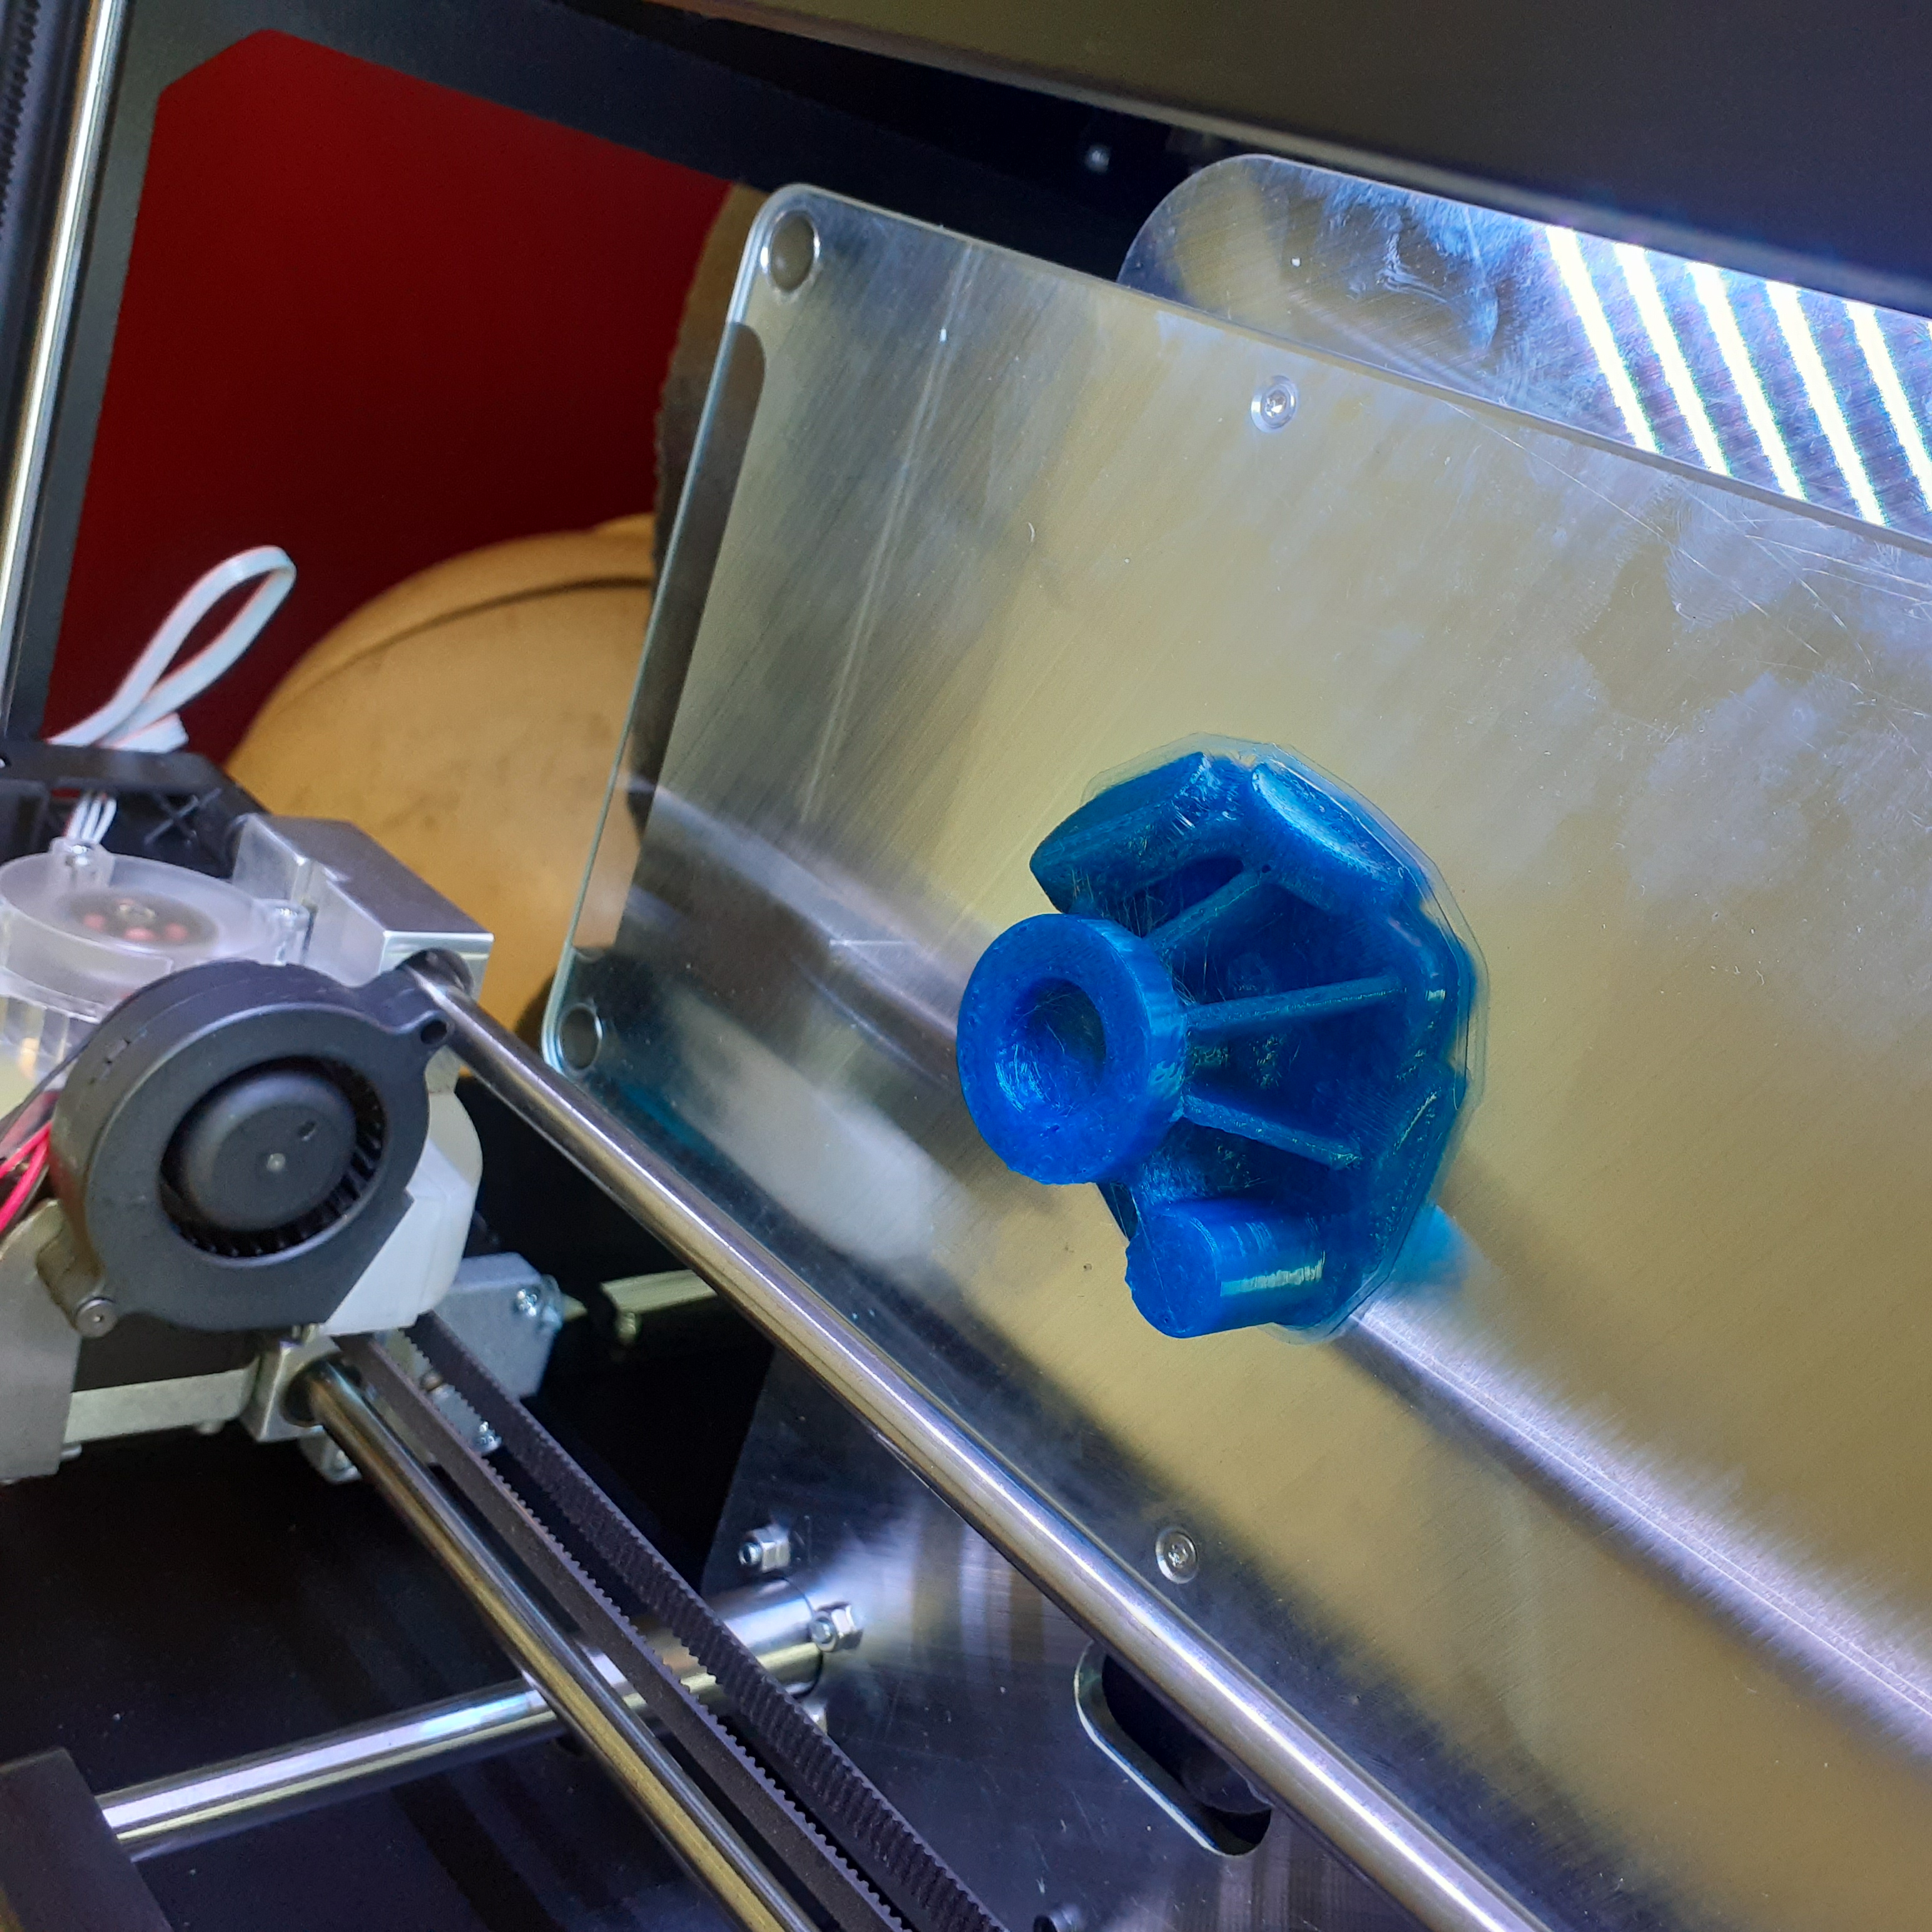
The plan is to investment cast these parts with 3D printed wax patterns. To do this on somewhat of a reasonable budget, some modifications were made to my already highly modified Makerbot Replicator 2 printer to allow it to successfully print using actual wax filament made by machinablewax.com. This 1.75mm filament is intended to be used directly in the investment cast process with no special burn-out cycles and an ash free result. To get this to print a Heated Build Plate was necessary. There’s no sense mounting a 90C component on top of a plastic part so an all-metal Z axis was also installed with linear ball bearings as guides. These parts were sourced from IDE 3D and installed and worked smoothly.
Getting the wax to successfully print will be a bit of a challenge. The first lesson was that the support structure sticks really and is difficult to cleanly remove.
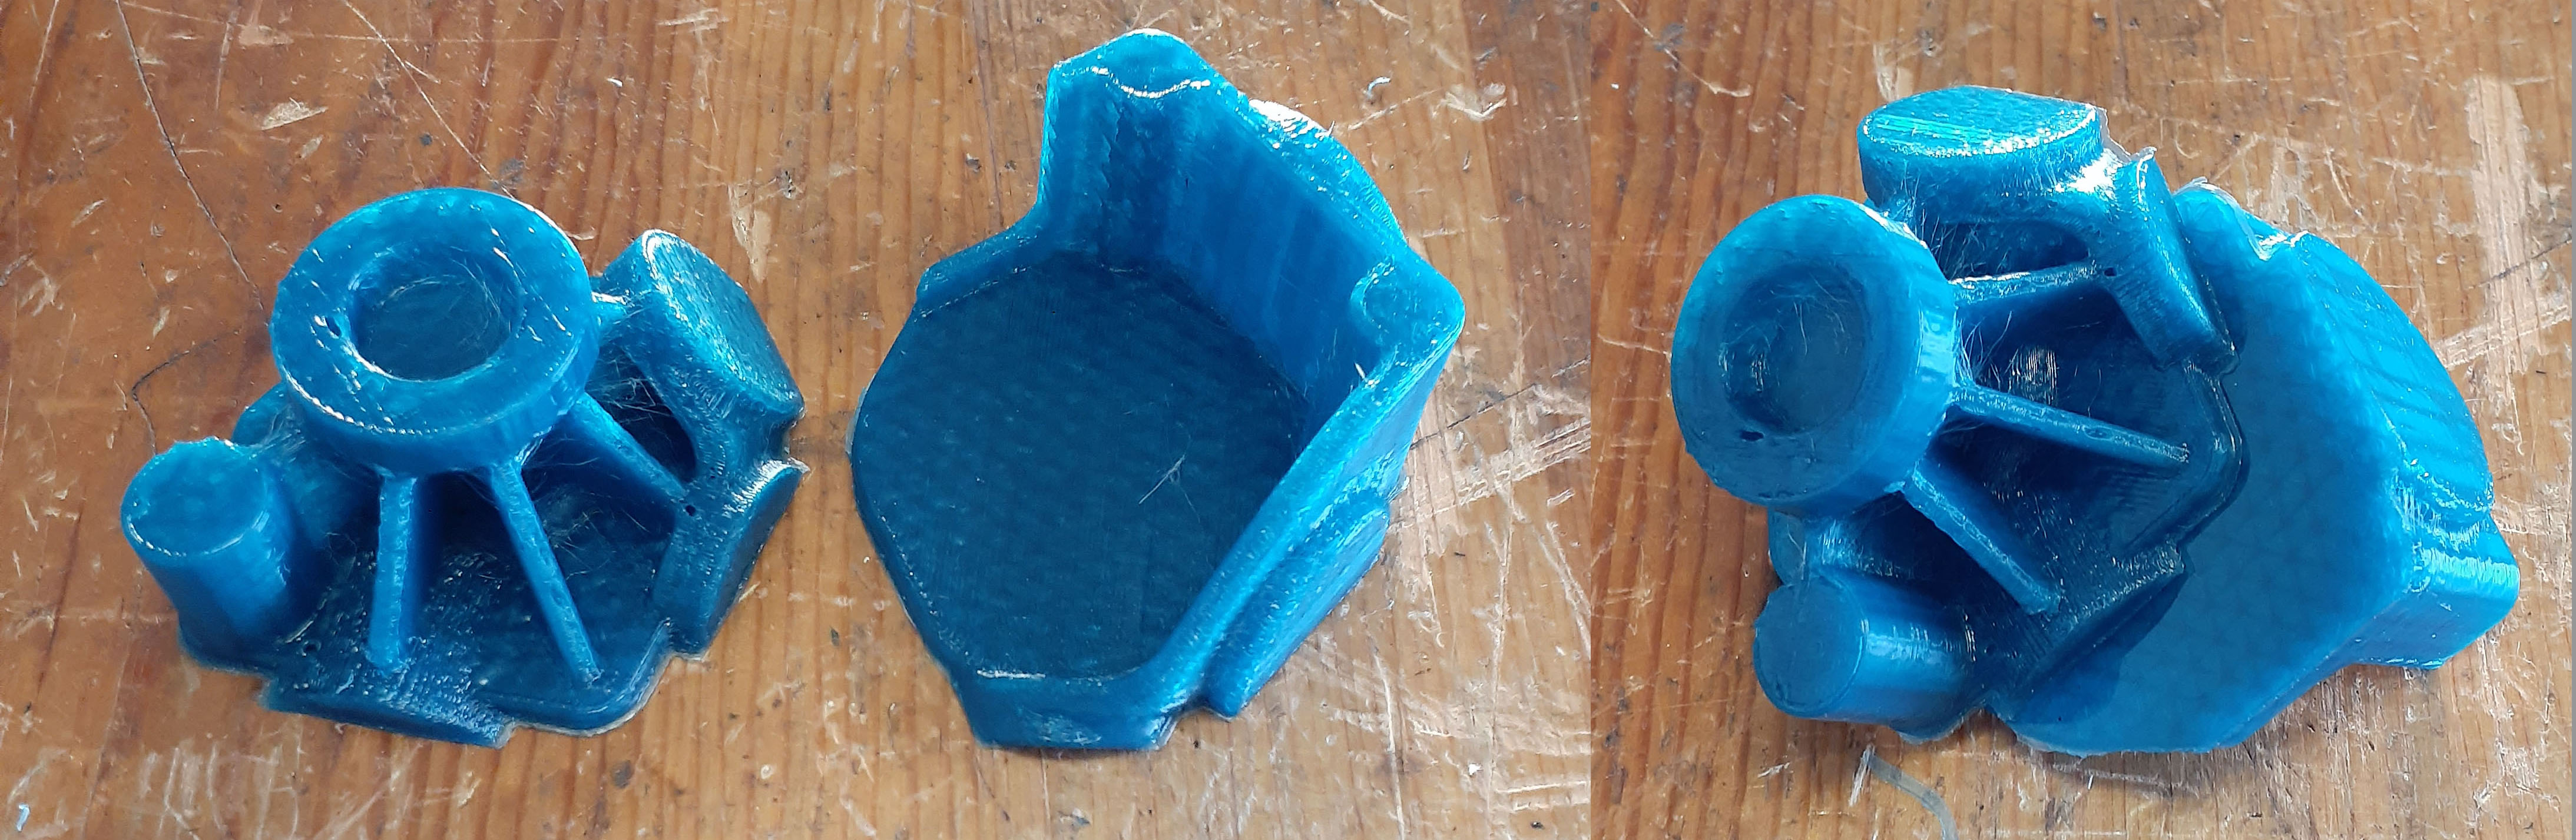
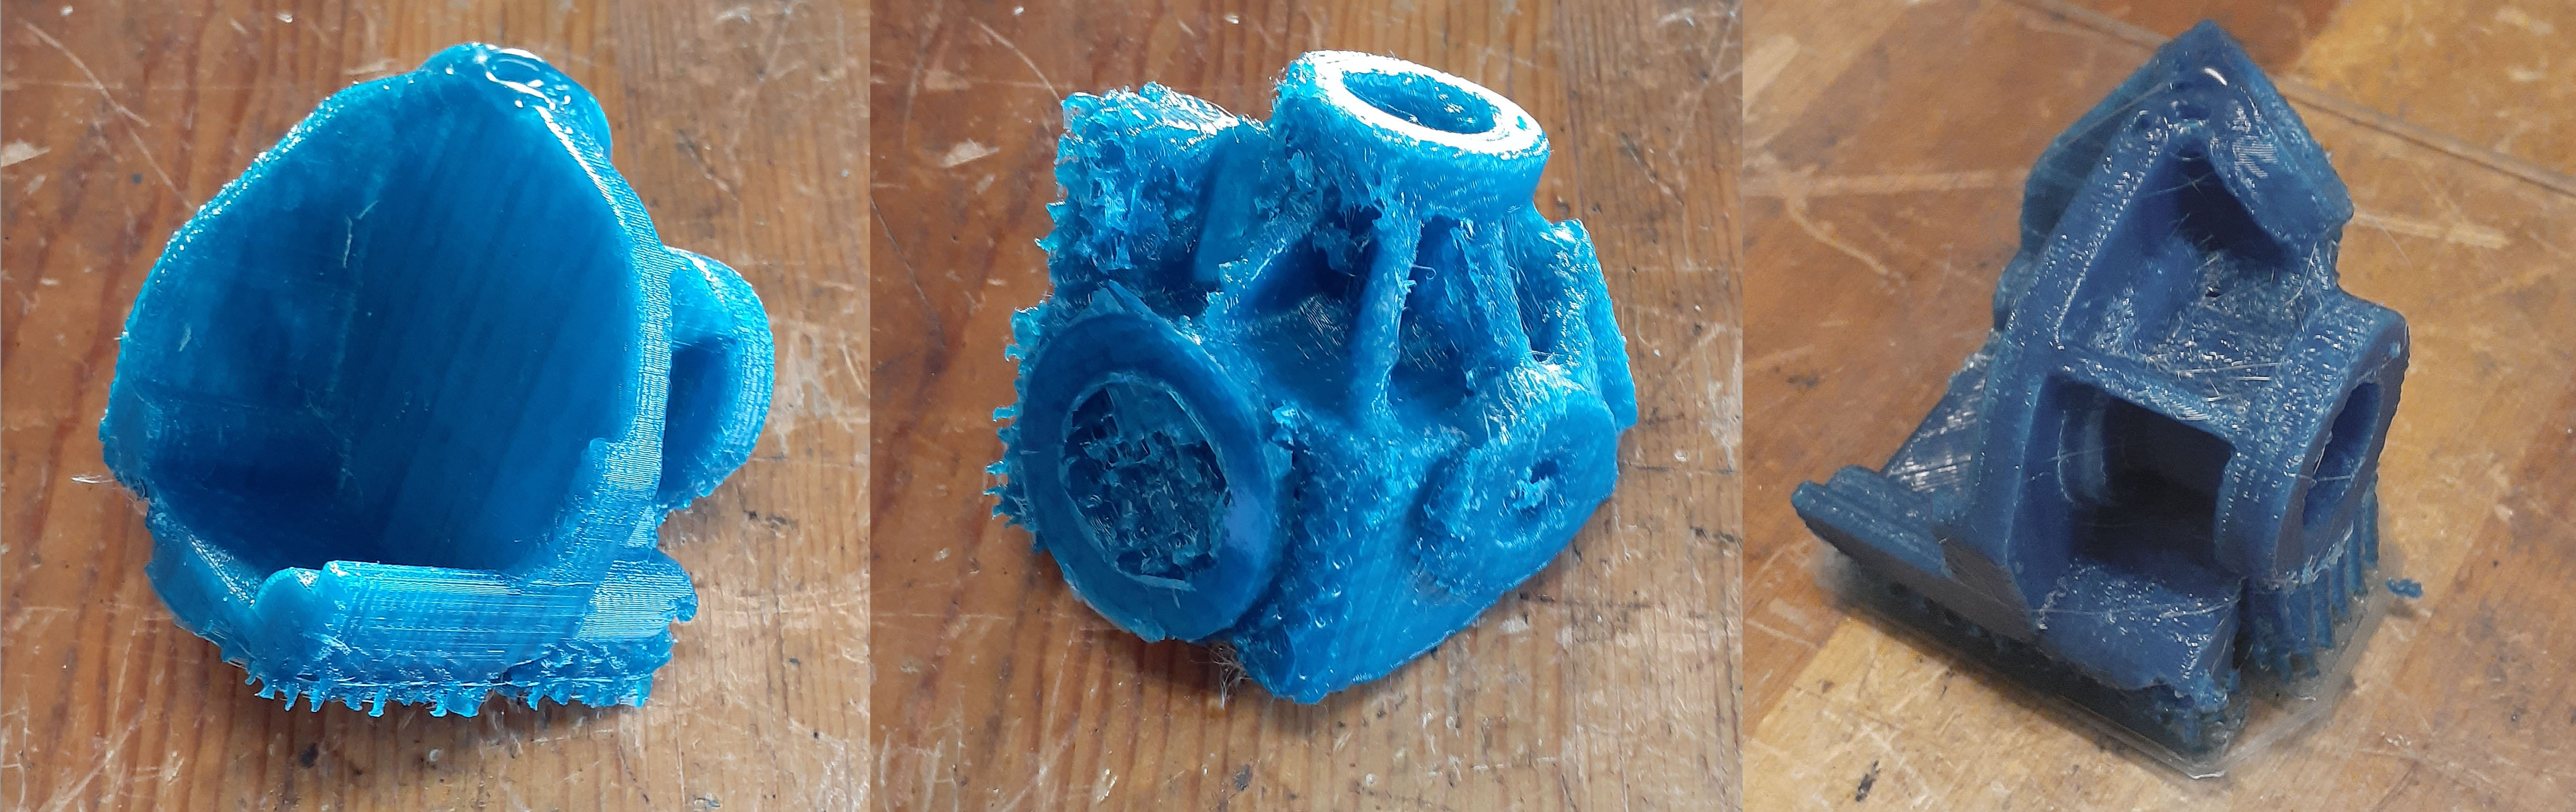 Since any pinholes in the wax will result in a failed casting from investment inclusions, it is important to have clean parts that require little rework. A fix is available from the world of FDM printing, and that is to have geometry that requires minimal supports. In this case, that is as simple as slicing the part in half along a convenient plane. This requires the parts are later melted together, but that is a simpler task than finding tiny pinholes in recessed support areas.
There are still some printing errors (pinholes) on these parts, but this is only my first go at printing parameters (150C print, 90C bed, 2 bottom, 3 top layers, 30% infill, 50mm/s, 20% cooling fan). Some of the wax seems a bit melted so the next try will be to lower the print and bed temps a little. I sent these pics to the wax manufacturer to see if they had any suggestions.
Once the process is tweaked to be more stable, I’ll spend a few weeks printing enough wax patterns for 3-4 sets of parts, then send them on to the steel foundry, Harbor Castings. They made some parts for the previous iteration that never made it to fruition.
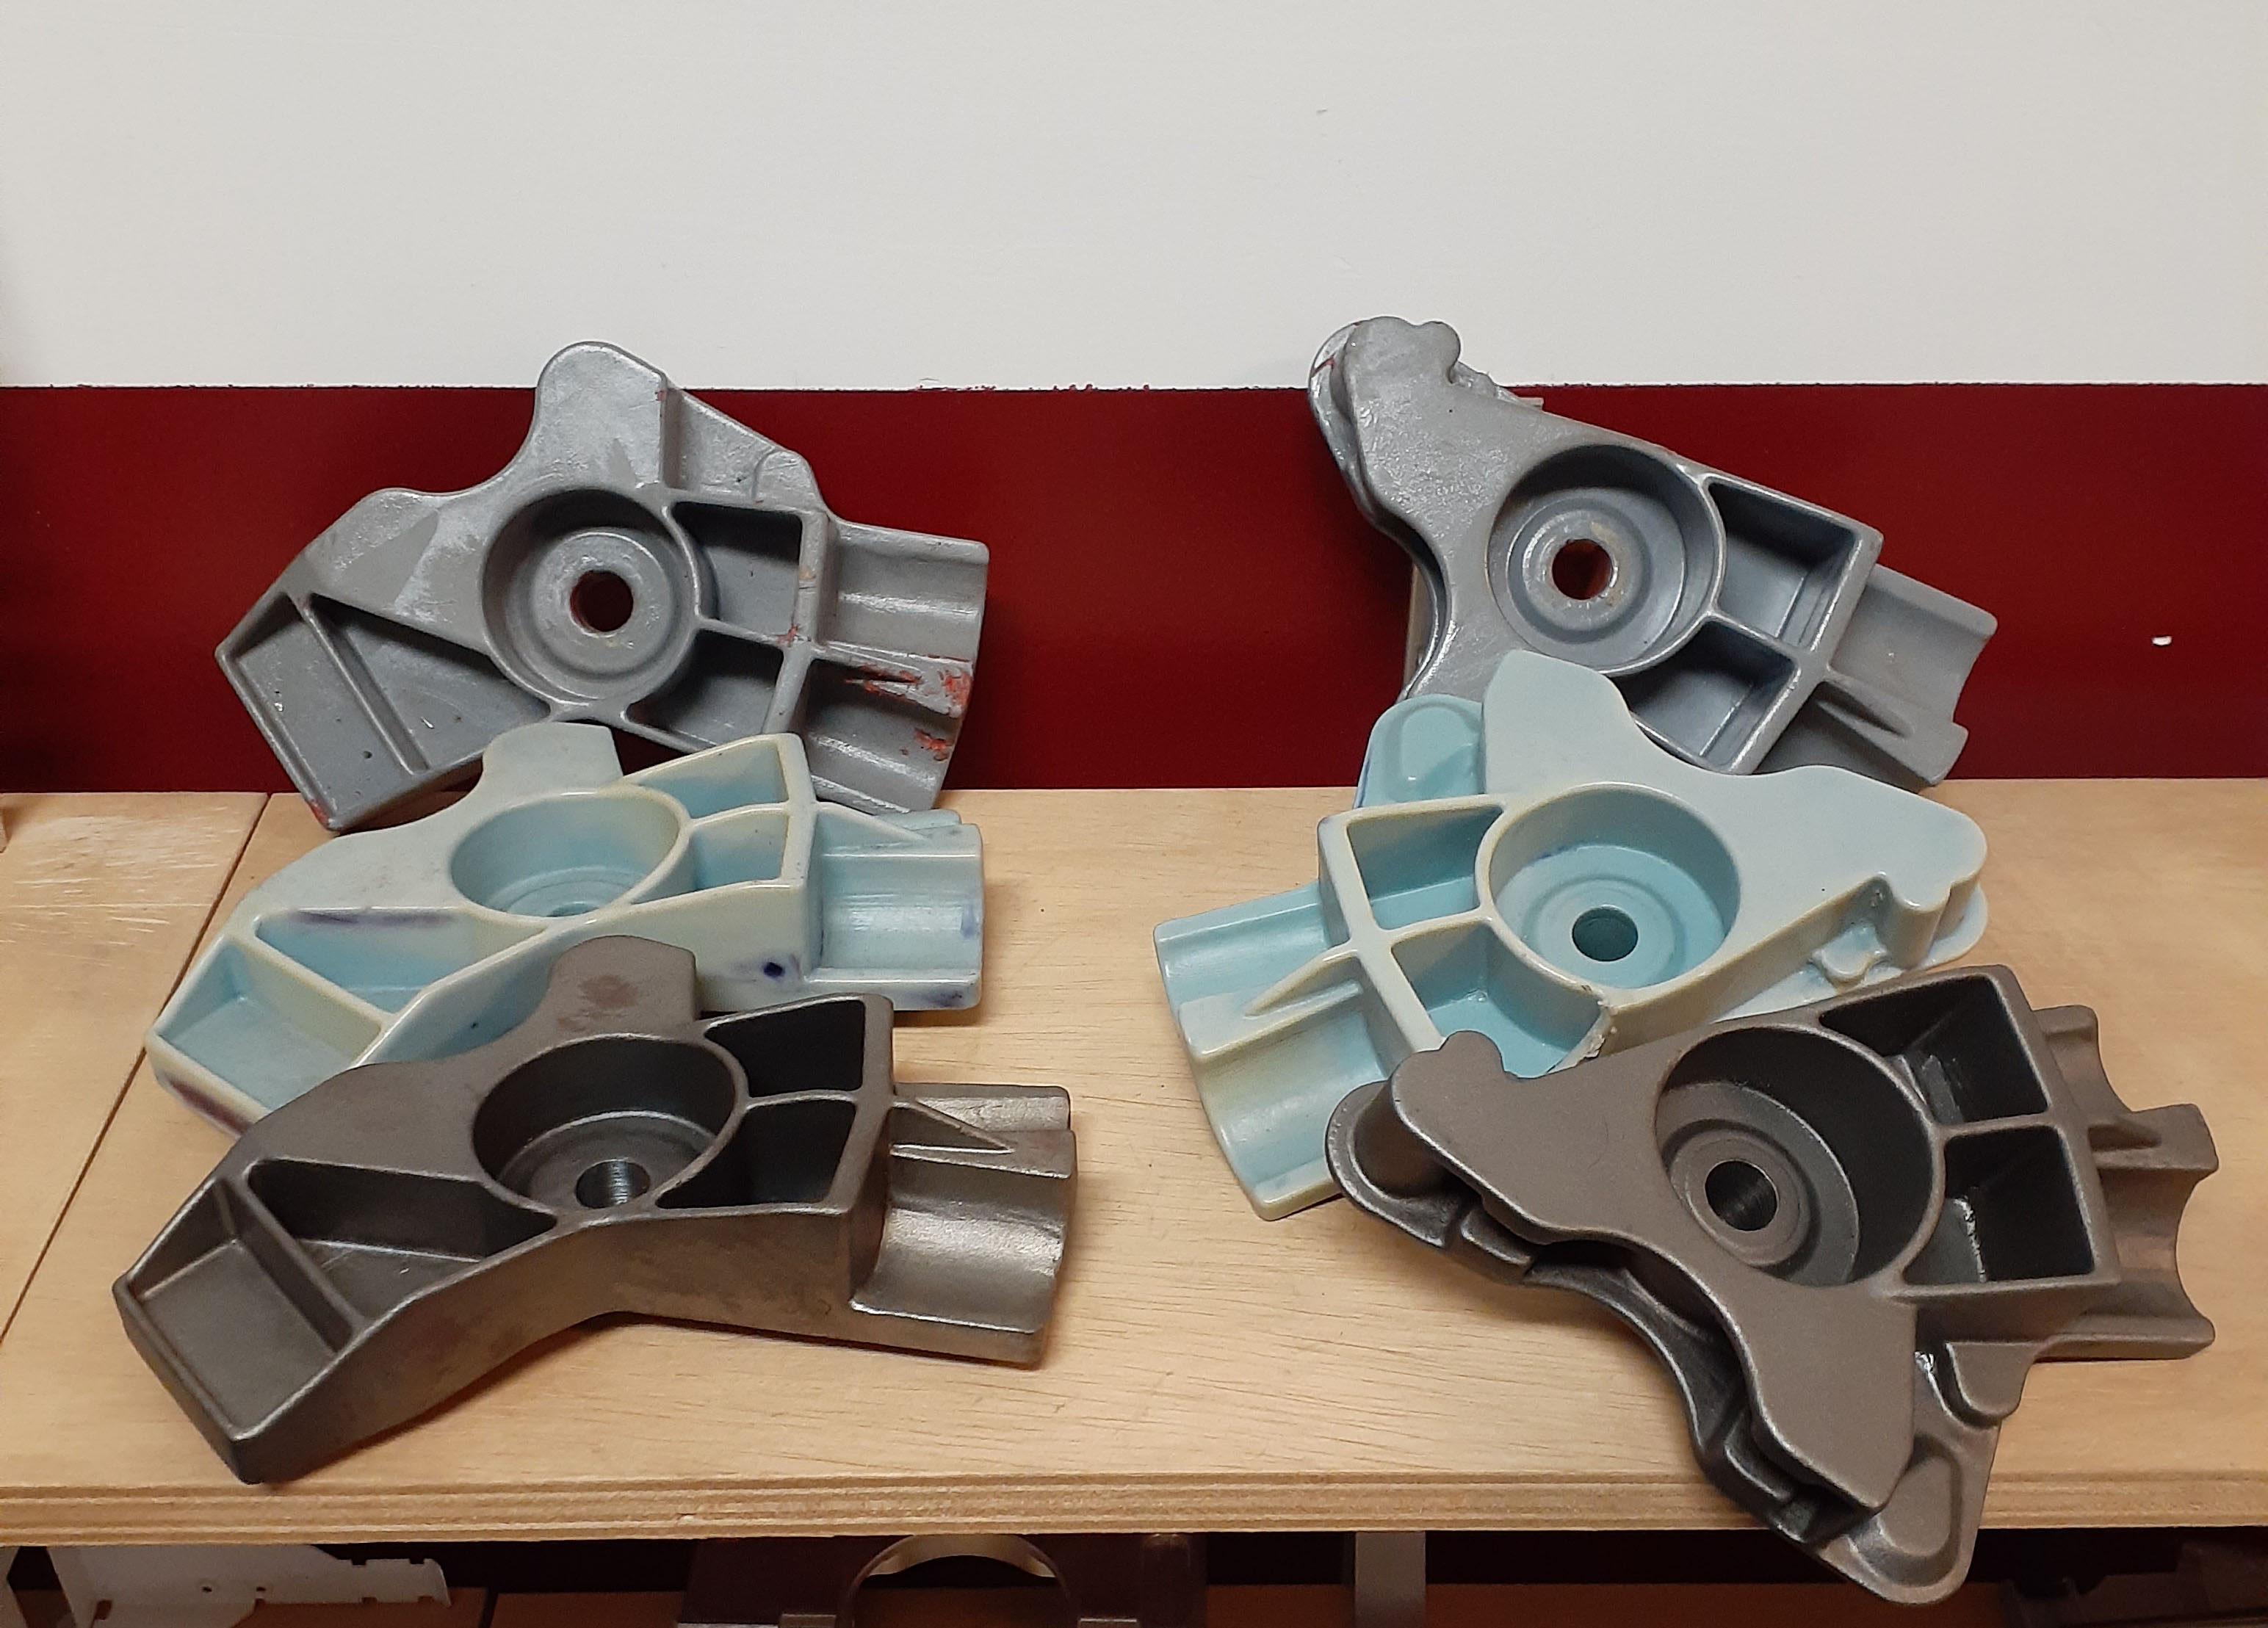
These parts were made by the pattern (sanded and painted 3D print, top) to silicone rubber mold to injected wax pattern (middle) to investment casting in 4130 steel (bottom). In the ensuing 10 years material development has progressed enough for me to eliminate the costly mold fabrication process and print directly in castable wax. People do have success doing investment casting by the burnout of PLA material, but this leaves a residue in the parts and the furnace. The foundry does not like the contaminants in the furnace, and I’d rather have a known precise material composition in my parts!
Quick update:
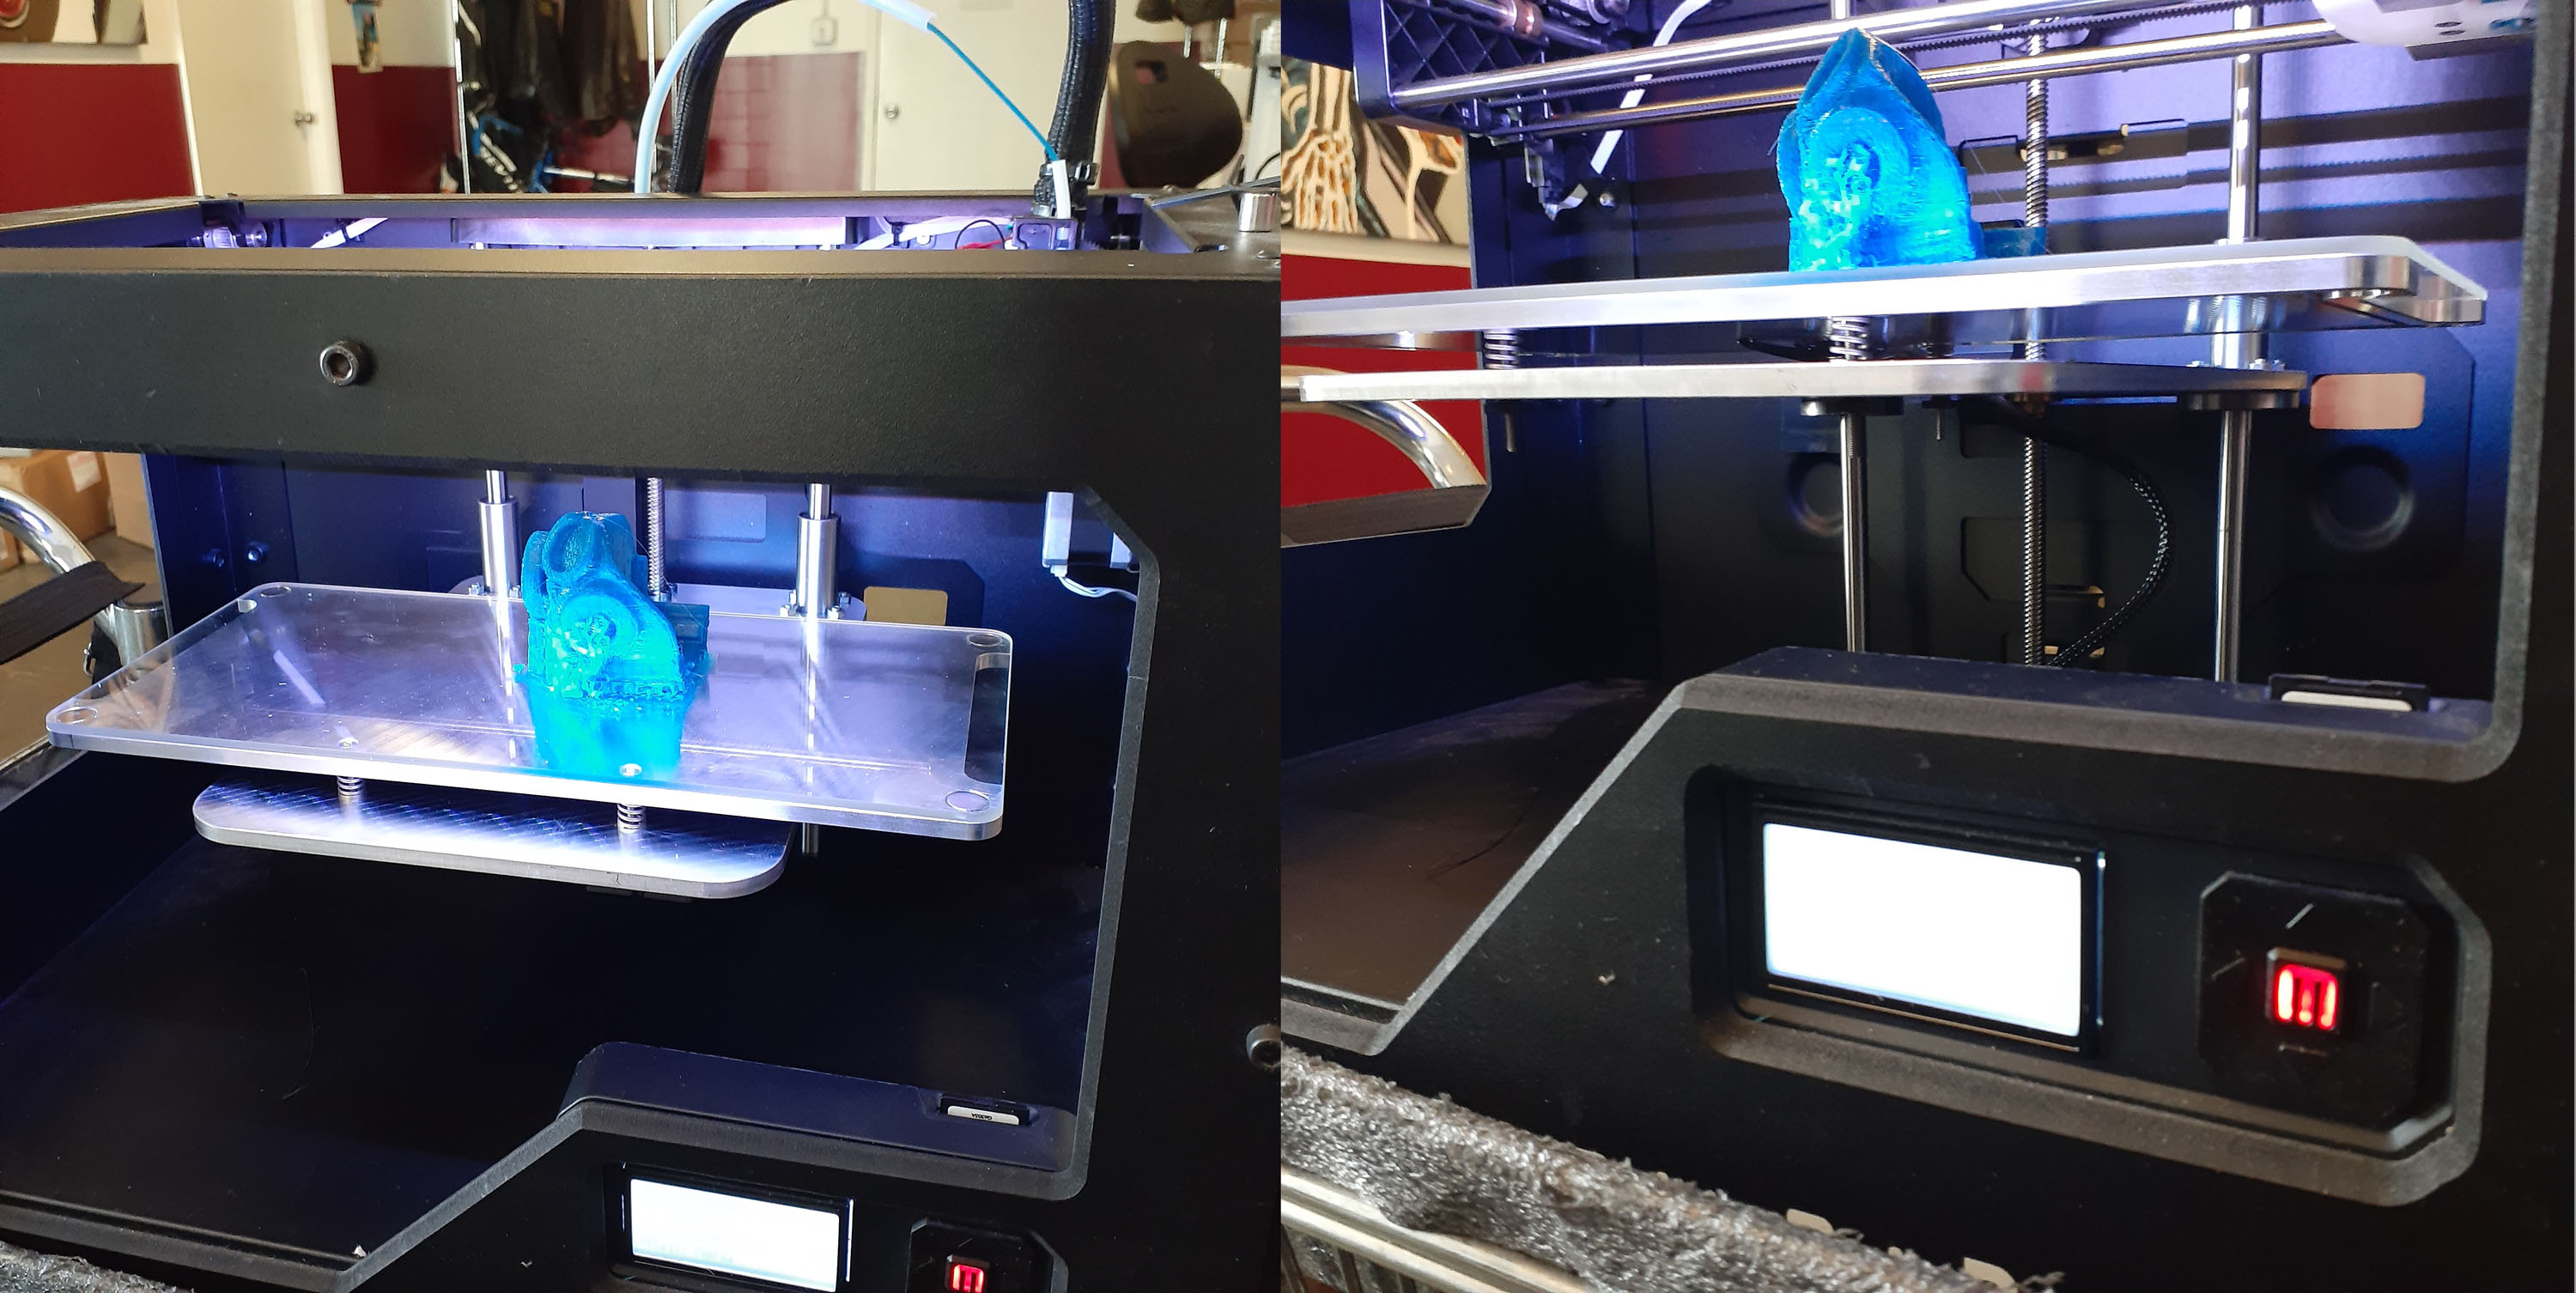
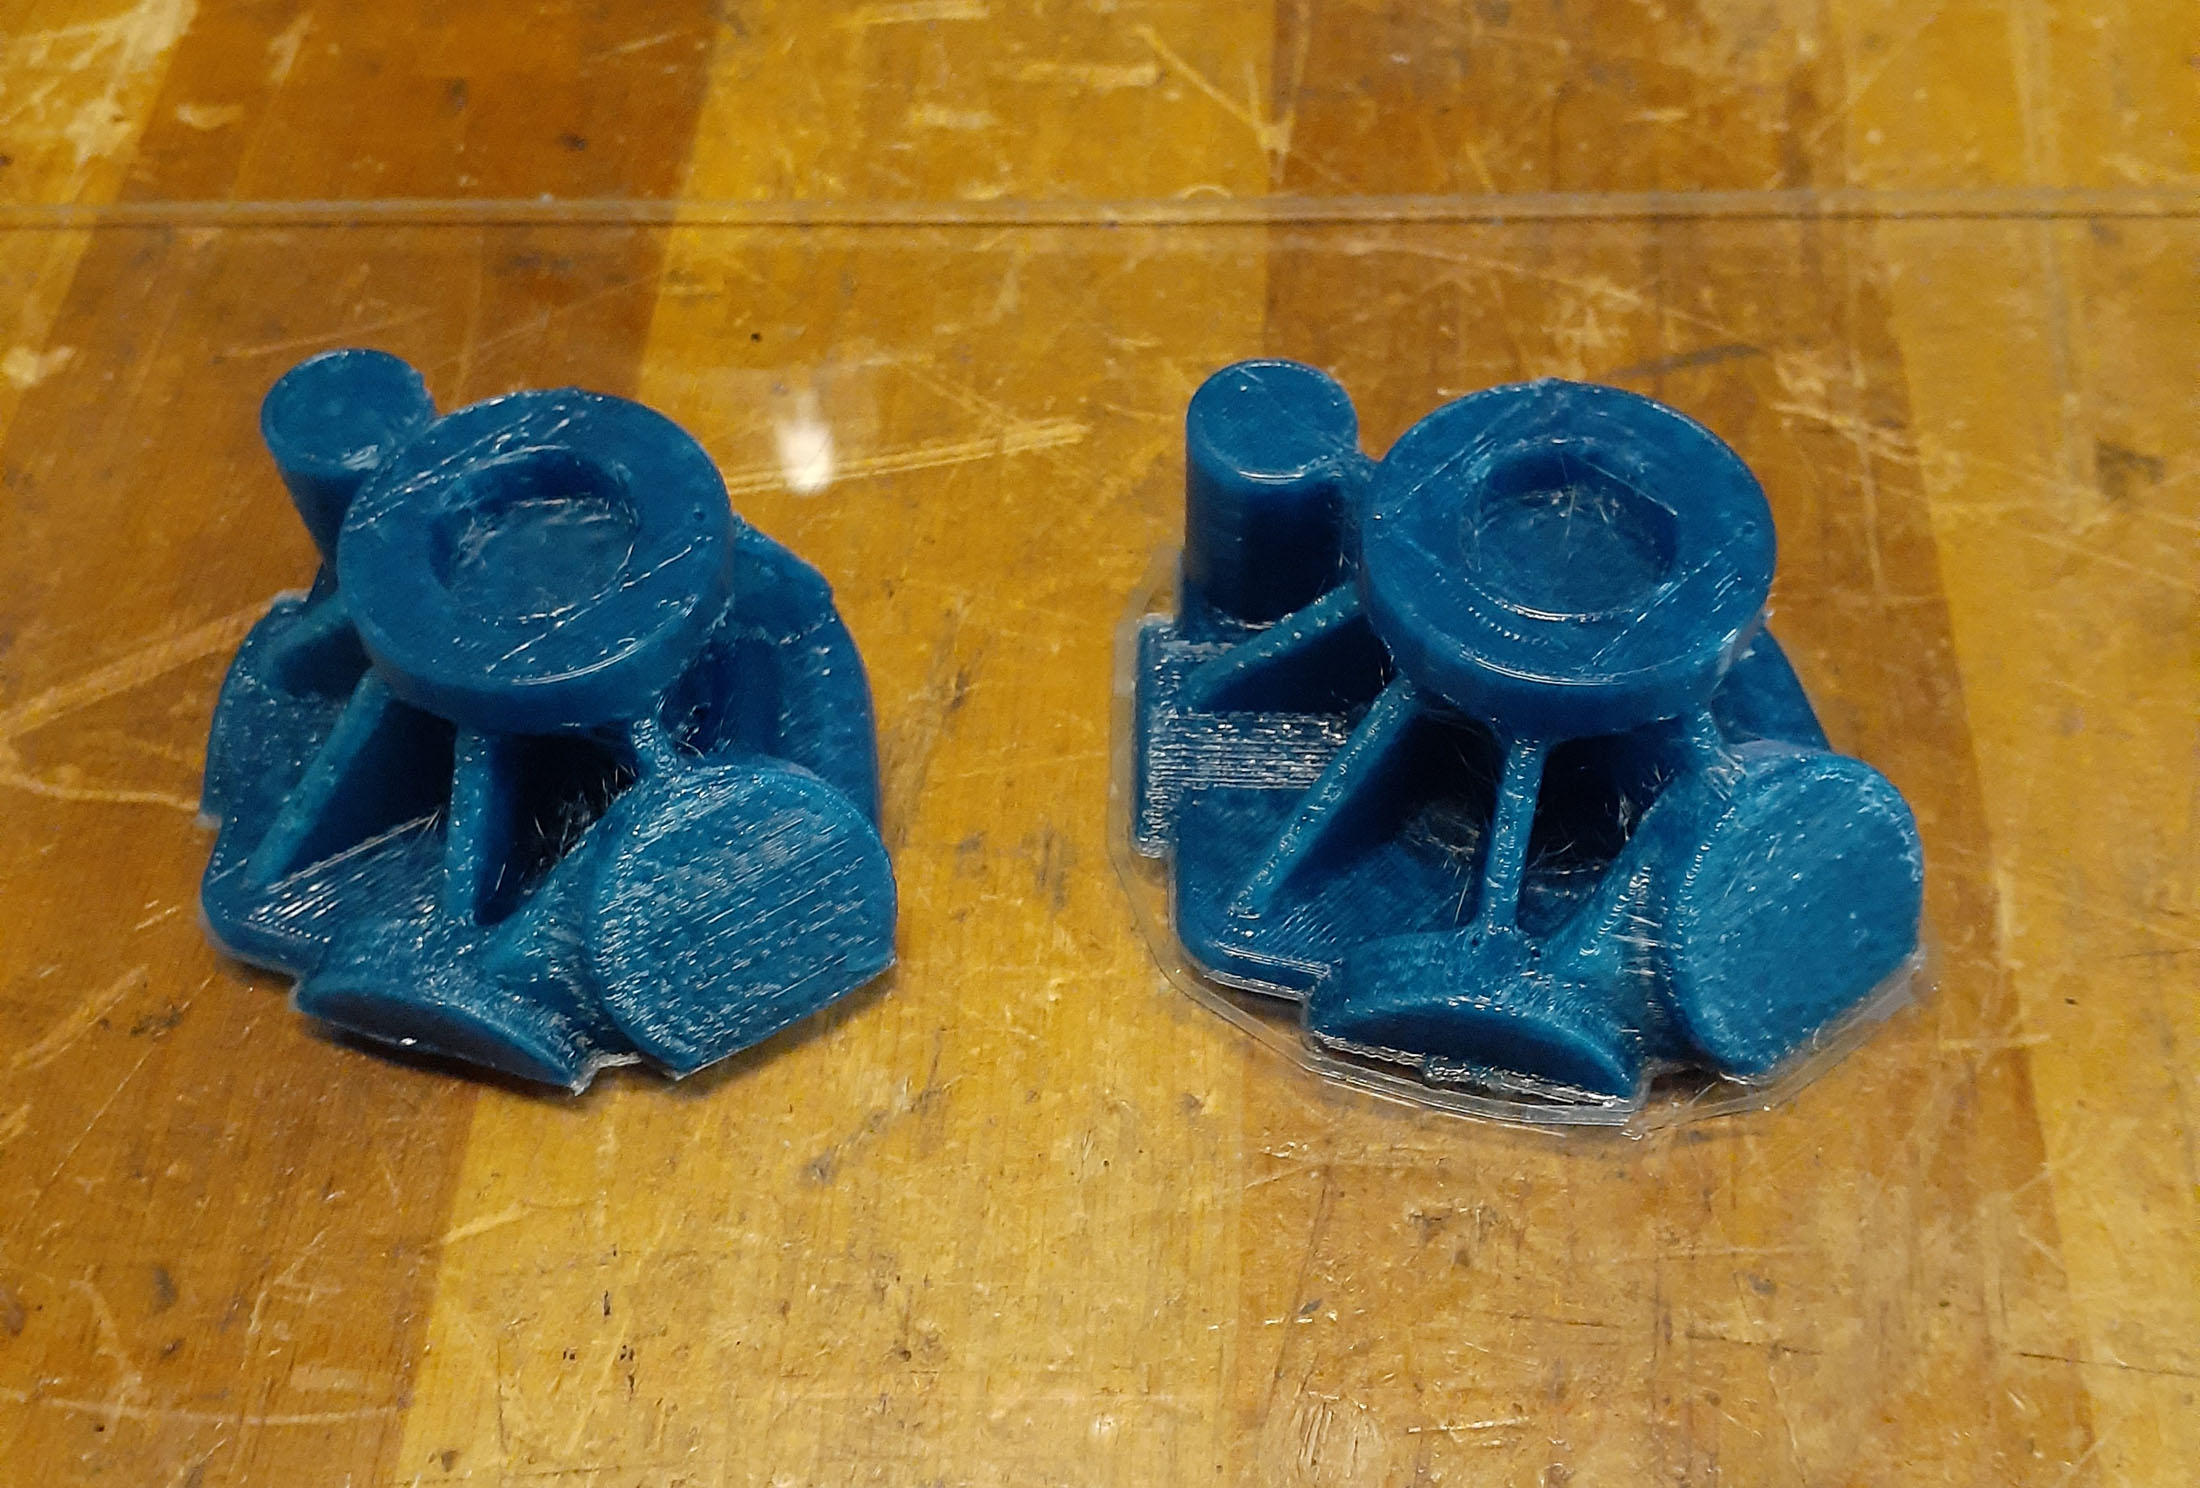
A print (right side) with slightly lower temps (140C print, 85C bed) came out marginally better. I’ll wait for some feedback from machinablewax.com’s tech support before doing any more print tests.

A gentle flame polish to seal the outer surface?
That is the plan but I’d like to get as good a print as possible to then flame process. The flame polish will also, ahem, polish the wax surface nicely and result in a smoother casting.
Oh Chris! Between the hassles, u must be having so much fun! Is there more joy I building, or racing the results!
Go on! Have fun! “We’re here for a good time, not a long time”!
I’m having fond rememberies of past builds (even if they were less than sucsessful). The smells of hot drilling oil. The warm fuzzies as u birth another part n it fits!
Keep up the good work! Ur enthusiasm is contagious!
IRN ED
Thanks! The most fun is in building, completing it and then racing! The trifecta!